This is the third installment on my journey to cover all the best practices listed in the Best Practices for Site Search eBook. The goal of this series is to explain in details how to apply each best practice using Coveo for Sitecore V4.
If you missed the previous posts, you can find the full series here.
Search Driven Content Pages

Search driven content pages, or listing pages, are result lists not usually offering a free text search box. The pages themselves tend to focus on a limited type of content compared to a standard search result page.
From a technical perspective, a search driven content page is simply a Coveo Search View rendering with several options removed.
The Coveo Documentation team released a guide similar to this blog post on how to use Coveo for Sitecore to create Search Driven Content Pages. I will still explain all of it below in order to relate my personnal experience, but be aware that it pretty much follows what the documentation provide.
9. Use search to drive your listing pages
Let’s start by building the search driven listing page. You will start with the standard Coveo Search View rendering and use the properties of the component to remove what you might not need. The Layout section will give you a large amount of options, so here is what I removed in the screenshot above:
- Display the main search box
- Display query duration
- Display query summary
- Display the tabs sections
This will result in a simple result page without the option for your users to search using free text queries.
If you followed the first part of this series of blogs, you might have removed the search box already to use a global one in the header. Just make sure that the id of the search page used for listing is not the one being referenced as an external component, since it will bind the search box to your listing page.
When it comes to styling, you might want the listing page to show something different than the excerpt under the result link. The excerpt is relevant to the keywords typed by the user, and since we don’t provide a search box, the excerpt will be static. To change the excerpt, change the underscore.js templates directly in the .csthtml file. I explained how to do this in Part 2 section 8 of this series.
Remember to always copy the .cshtml file before editing it! Editing a base file is a bad practice, and it quickly turns upgrading into a nightmare.
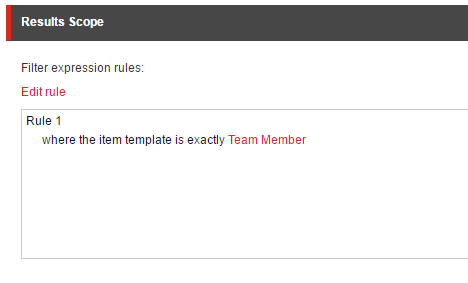
Finally, you may want to change the scope of the results displayed. I have not yet explained how to add filters to a query, but this is an important part of any search solutions. A query scope is simply a set of filtering expressions to focus on a specific set of results.
The filtering expressions can be added programmatically or through the Sitecore rule engine if you have the Enterprise edition. In the example above, the listing page is only showing content from the Team Member template in Sitecore. The template assigned to an item will be defined with the __templatename field in Sitecore and can be used for filtering.
Here is an example using the Sitecore rule engine directly in the properties of the component (ranking editor of the Enterprise edition):
And here is an example with some JavaScript code directly in a copy of the SearchView.cshtml file:
Coveo.$('#@Model.Id')
// We hook ourselves to the bildingQuery event, so all the component exists, but the query has not yet been sent to the index.
.on(Coveo.QueryEvents.buildingQuery, function(e, args) {
  // We add a filter expression to display only items that are using the Team Member template.
  args.queryBuilder.advancedExpression.add('@(Model.ToCoveoFieldName("_templatename")) == "Team Member"');
})
// Then we pursue the initialization of the search page.
.coveoForSitecore('init', CoveoForSitecore.componentsOptions);
A full step by step guide for the ranking editor is available here. The JavaScript approach is available here.
The above code will make sure that our page is only listing content from our selected template. The query syntax used is unique to Coveo and you can find the full guide here.
Do not mistake the query scope with permission management, which controls who has access to what. I have seen several search solutions where permissions are controlled with filter queries, which is not a good practice. Permissions to access a document should simply respect what has been set in the Sitecore Access Viewer. Coveo will index the permissions along with the documents when crawling Sitecore. At query time, the index will map the permissions with the user sending the query. There are a lot of subtleties when it comes to security, but I will not go over all of them here here. If you want to learn more on permission management, read this article.
As a summary, we created a listing page by using the default Coveo Search View rendering and then customizing the properties, the style, and the scope, but not the logic underneath. Which means that facets, sorts, and every other feature of a Coveo search result component can still be used. It also means that everything happening on your page will be tracked by Coveo Usage Analytics and can be used to power Coveo ART and Machine Learning Recommendations. Your static listing page will then start to learn, and can reorder the listing based on what is the most popular.
10. Offer facets to filter and navigate search-driven content
I mentioned above that using the Coveo for Sitecore Search View rendering to drive your listing pages will allow you to use several placeholders to add more advanced controls such as sorts, facets, and tabs. This means that adding a facet to a listing page is as easy as adding it to any search result pages. The step by step guide can be found here.
These facets are dynamic so their value will adapt to the filters set on the page. They also come with several properties which can be set directly from the Experience Editor.
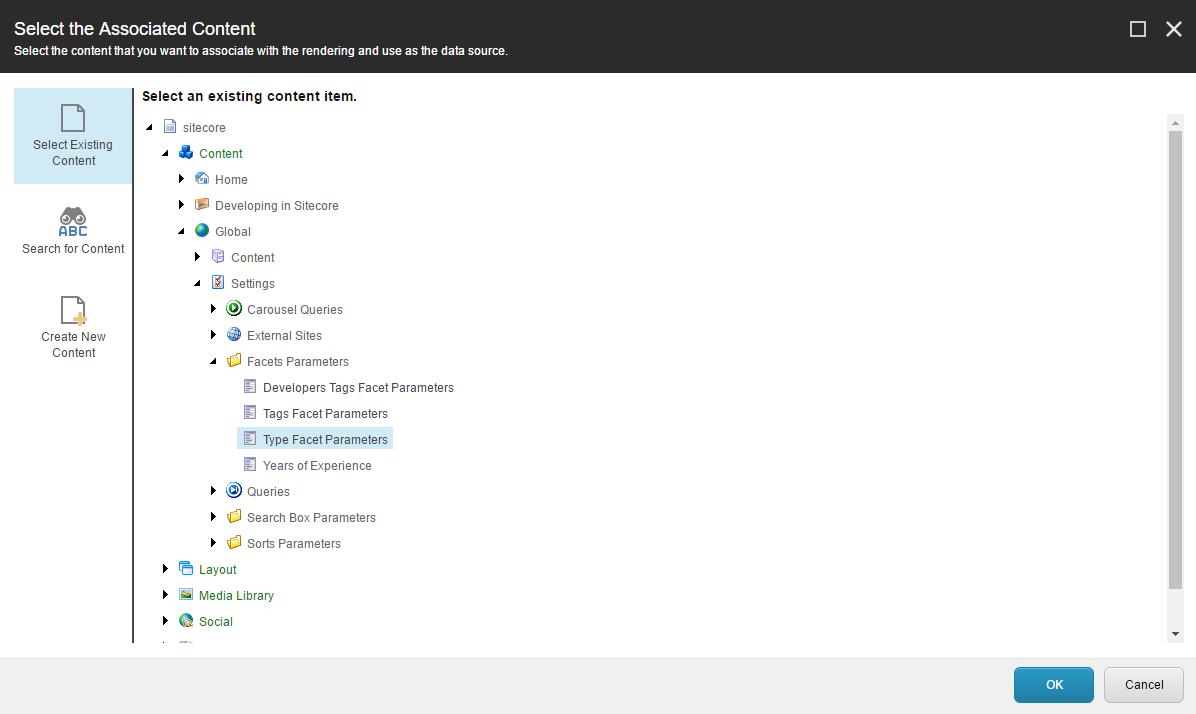
Manually setting the properties can be a lot of work if you have multiple listing pages. To speed up this process, use parameter items. I briefly mentioned parameters items in the first part of this series of blogs. In brief, you can create items inheriting from the CoveoModule templates and select their options upfront. With the options already selected, you can use them as Data Source when inserting a Coveo component in a page.
This way you can fine tune your facets and use them across your entire site without repeating the steps on each listing page.
11. Leverage all the “Contextual Clues” you can
We saw earlier that you can use JavaScript code to filter results based on certain conditions. For example, a company selling desktop and mobile wallpapers might want to filter or boost images which fit the screen of the visitor:
Coveo.$('#@Model.Id')
.on(Coveo.QueryEvents.buildingQuery, function(e, args) {
  var pageWidth = window.innerWidth;
  if(pageWidth < 600){
    // If the page width is smaller than 600 pixels, only show mobile wallpapers.
    args.queryBuilder.advancedExpression.add('@(Model.ToCoveoFieldName("Product Category")) == "Mobile"');
    // Or boost instead of filtering.
    args.queryBuilder.advancedExpression.add("$qre(expression:'@(Model.ToCoveoFieldName("Product Category")) == \"Mobile\"', modifier:'60')");
  }
  else {
    // If the page width is larger than 600 pixels, only show dekstop wallpaper.
    args.queryBuilder.advancedExpression.add('@(Model.ToCoveoFieldName("Product Category")) == "Desktop"');
    // Or boost instead of filtering.
    args.queryBuilder.advancedExpression.add("$qre(expression:'@(Model.ToCoveoFieldName("Product Category")) == \"Desktop\"', modifier:'60')");
  }
})
.coveoForSitecore('init', CoveoForSitecore.componentsOptions);
I introduced a new concept in the code snippet above: boosting. Boosting is done using Query Ranking Expressions (QRE) which will accept a condition and a modifier.
The condition is using the same field query syntax used to define the query scope. The modifier is an integer which will tell the index by how much this result should be boosted. The number can be negative and does not have any limits.
I recommend setting it between -100 and 100 since a larger number will simply override basic relevance. Ranking management is a rich topic which I will not fully cover in this post, but you can read more about it here.
Another great use of contextual clues is using geolocation to return the results closest to the user’s location. Coveo supports Query Functions which allows you to generate a new field at query time based on the result of a mathematical operation. Here is an example of a query function to retrieve the distance between to points using the dist Query Function.
// The values are hardcoded; simply replace them with your logic to retrieve the location of the user.
var refLat = "37.77919";
var refLng = "-122.41914";
// Used for value in meters.
var radius = "10000";

Coveo.$('#@Model.Id')
.on(Coveo.QueryEvents.buildingQuery, function(e, args) {
  // For this Query Function to work, you need to have a longitude and latitude field on your items.
  // If the latitude and longitude fields are Sitecore fields, use the ToCoveoFieldName helper.
  var geoQuery = "$qf(function:'dist(@latitude,@longitude," + refLat + "," + refLng + ")', fieldName: 'distance') @distance<" + radius;
  if (args && args.queryBuilder) {
    // This is the filter, remember that you could also use a Query Ranking Expression to boost instead of filter.
    args.queryBuilder.advancedExpression.add(geoQuery);
  }
})
.coveoForSitecore('init', CoveoForSitecore.componentsOptions);
This code sample was taken from this help page.
12. Personalize with the Sitecore xDB
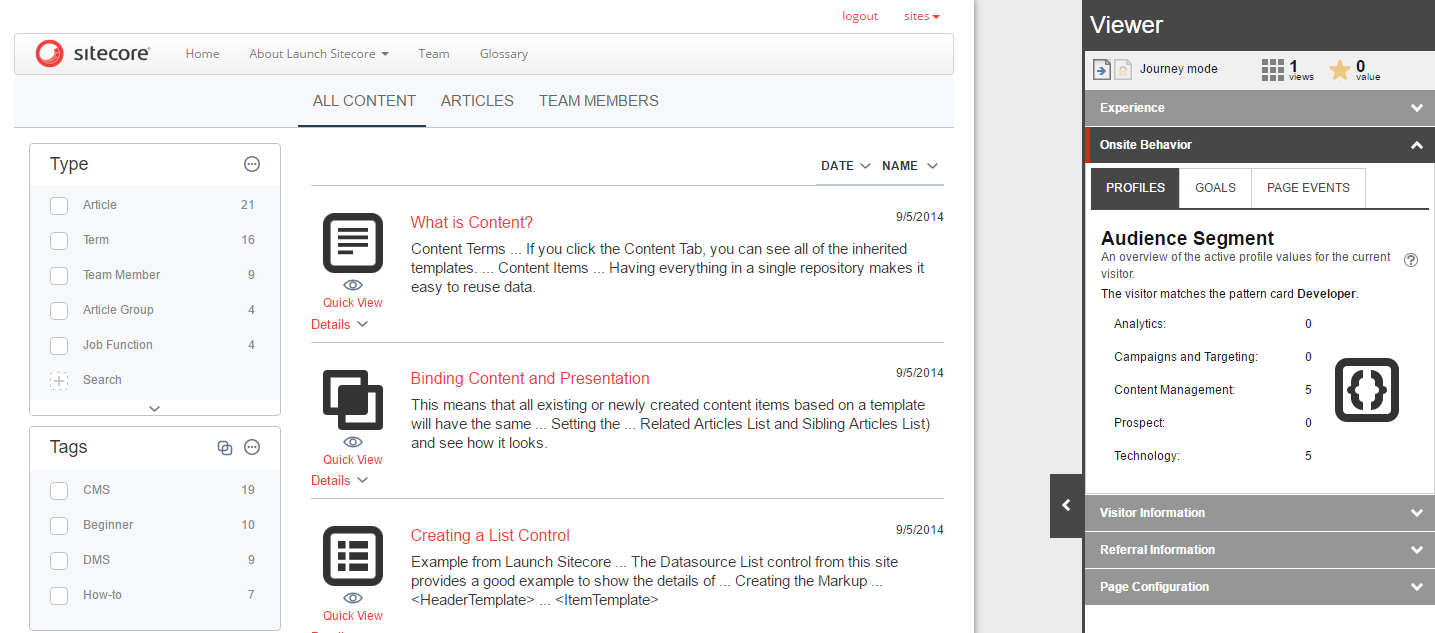
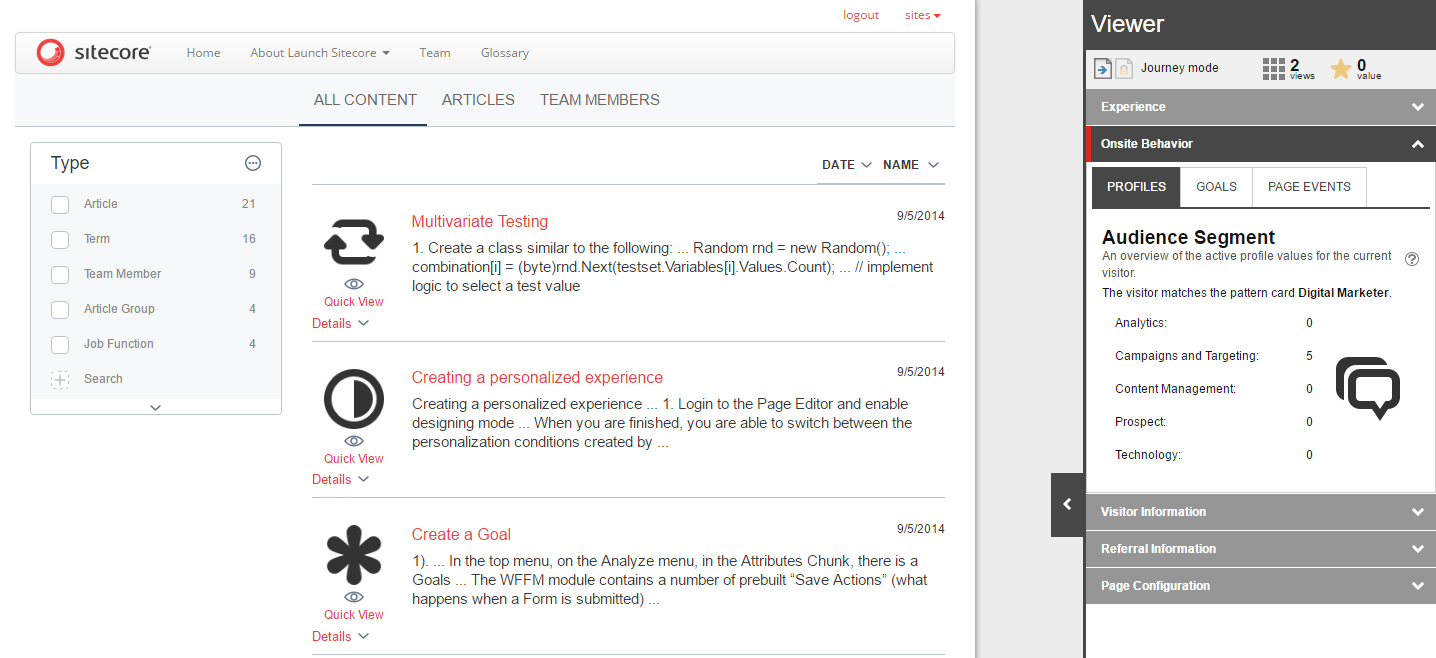
Sitecore xDB gives you the opportunity to categorize your user (Patterns) and your content (Profiles). If this is done properly, you can change the experience of your users and give more priority to content relevant to them.
To change the experience, rendering personalization can be used on all Coveo for Sitecore components.
For example, I might use the same interface to show products and support documentation on these products. To do so, I created a pattern for prospects and one for existing clients. The users will have a assigned to them when they sign in or visit a content with a certain profile card. Once the pattern is assigned to the user, you can use personalization on the component directly from the Experience Editor. You can then modify the behavior of the component using parameters items, or simply hide the component as shown on this screenshot:

Back to the example of prospects and existing clients, you might use this to show a specific facet or tab only for existing users with advanced preferences related to the product.
As for the results themselves, you can use the same logic I detailed previously to boost or filter content based on the pattern of the current user.
You can also filter content based on the profile card associated to this content. To do this, you will first need to index Analytics fields by adding the indexAnalyticsFields element to the Coveo.SearchProvider.Custom.config and setting it to true.
For more information on this element, please refer to this guide.
Once you have the Analytics fields indexed, you can use them in any filtering or boosting rules, or if you have the Enterprise Edition, use Automatic Boosting. Automatic boosting will map profile cards and user patterns in order to provide content matching the pattern of the user.
Here are two example of the same page showing different content for two different user patterns.
This is it for this part folks! Remember that a listing page is nothing more than a search result page with a custom style, scope, and set of features. This means that everything about context and Sitecore xDB can be used on a standard search result page.
If you wish to read other post on this series, click here.